.svg)
How to Make Your Shopify Store Live | Step-by-Step Tutorial
Last updated on
May 15, 2026
After properly setting up your Shopify store and working on it for quite some time, some store owners start thinking about why they aren't getting any visitors. They ask why nobody is noticing it and why isn't my store public.
The reason why this happens is that your Shopify website is not published. You need to publish your store so shoppers can access it. However, publishing or making your Shopify store live is not that cumbersome when you properly know how to do it.
Quick Look at Things you Should have Completed
After opening your Shopify store and taking it online, you must ensure you have properly done these steps. If you think you have completed these steps, you can move directly to the publishing process.
Sign up with Shopify
The first step is to create a Shopify account. The main things you’ll be required to fill in include your email address, password, store name, contact number, country, and name.
Select your Shopify Theme
Once you have completed the signup process, you’ll be taken to the Shopify admin interface. From Shopify admin, you can customize your store, set up payment methods, upload files & products, and set up shipping to customers.
The most important part, however, is setting up a front that your visitors interact with as they browse through your products. In order to do this, go to the Shopify theme store and choose a theme.
Shopify fully supports and integrates theme designers so that you can smoothly run your store without any modifications. When you are customizing your themes, remember to compress the images in order to increase your store’s loading speeds.
Add/Upload Products
The most important part and the main reason you open a Shopify store is to sell products. Therefore, the next step after opening a Shopify store and customizing the store is adding products.
- From the Shopify dashboard, go to Products.
- From the Product page, click Add product to add products.
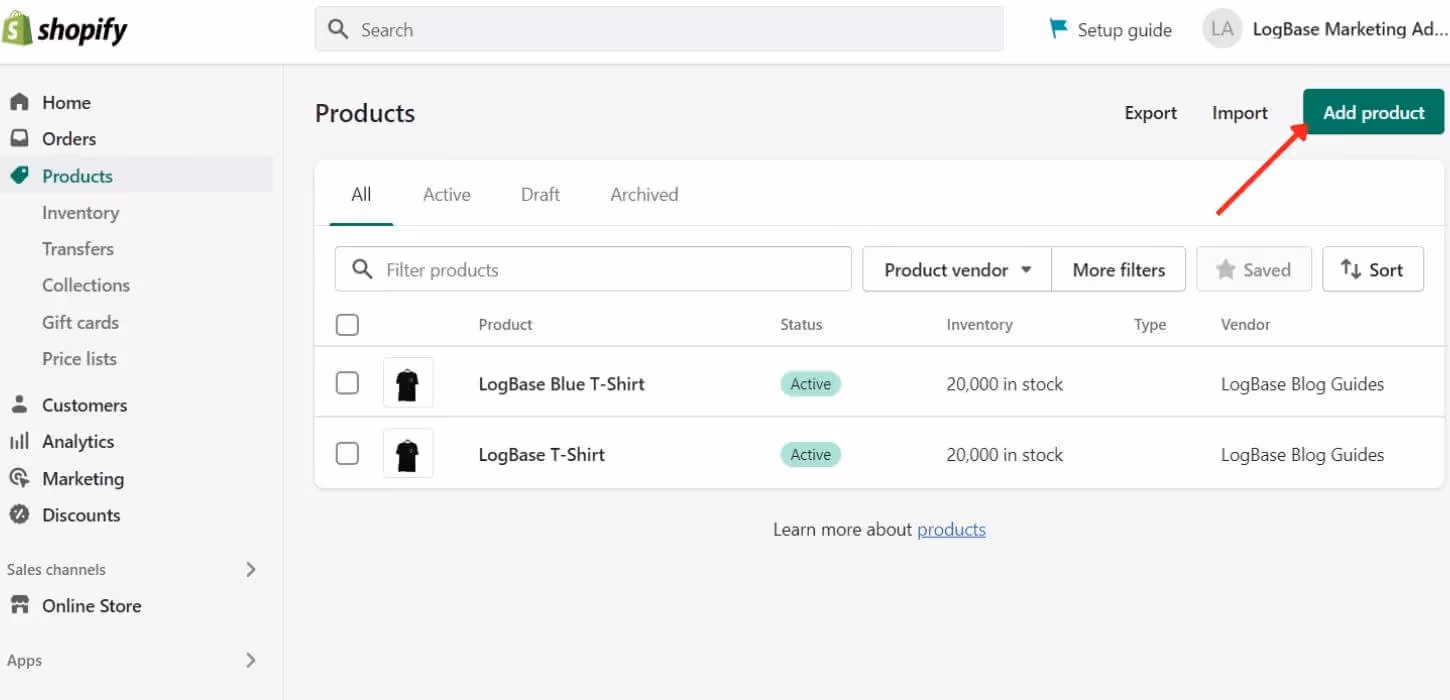
- Add your product title, description, and other key details including product images, pricing, SKUs, etc.
- Now click Save.
Select a Plan
The greatest benefit small business owners get from using Shopify is the ability to choose a plan that fits their budget and needs. Shopify is a platform that serves all businesses regardless of their size. Here are the plans:
Main plans
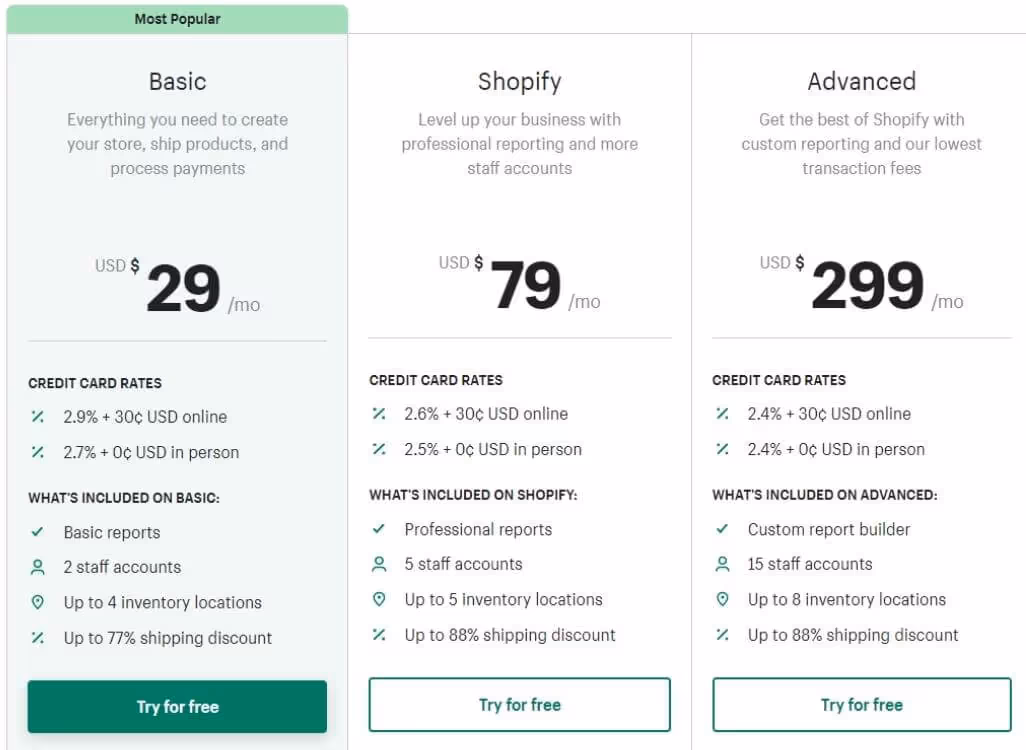
Pro Tip: First fully create your Shopify store before subscribing to any plan. This way you will not be charged while your store is in development. Another thing, if you're just starting out on Shopify and you don't have much staff, you can opt for USD$29/month plan. Then as your profits grow, and you feel the need, you can then switch your plans.
Furthermore, Shopify also offers annual plans which will save you money, but it entirely depends on your needs.
Choose your Payment Provider
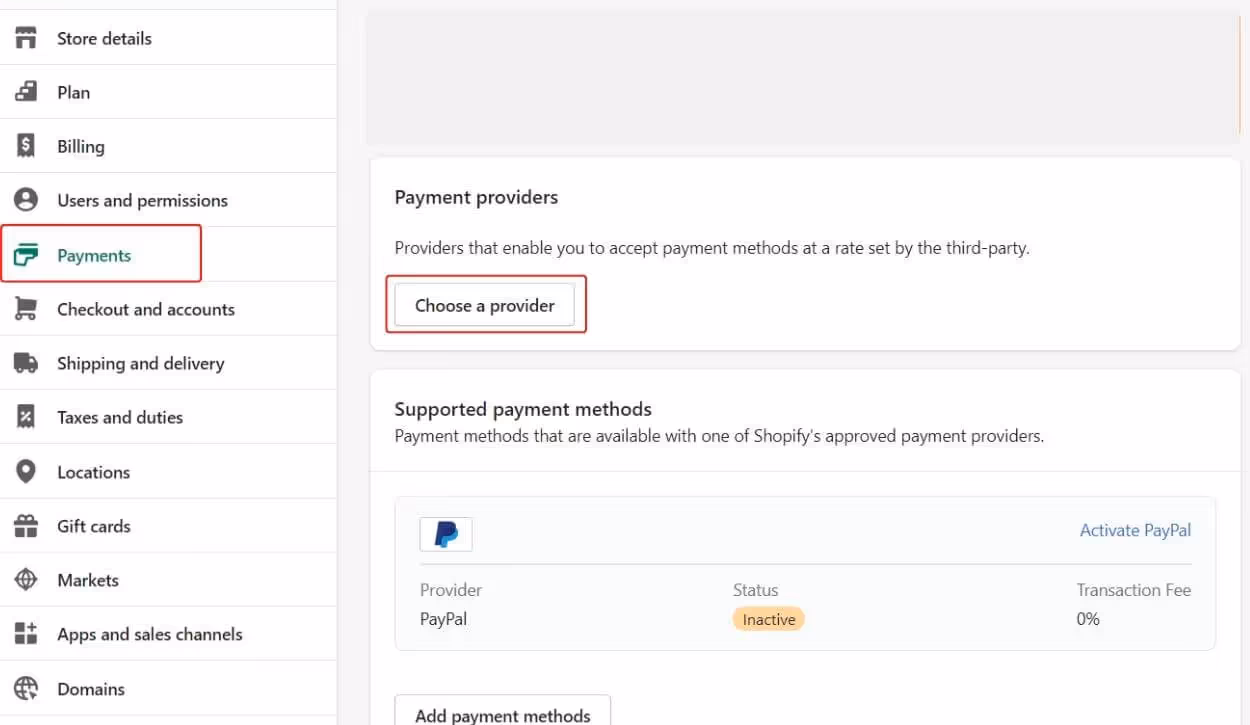
Shopify has its own payment provider called Shopify Payments. However, this payment provider offered by Shopify is only available to US-based merchants. But there shouldn’t be any cause for worry since Shopify integrates local and global third-party payment providers. To choose a payment provider:
- Go to Settings and click Payments
- Under the payment providers section, select Choose a provider
Steps to Set your Shopify Store Live
1. Add Your New Domain in Shopify
- From the Shopify admin, go to Settings and click Domains.
You can either buy a new domain or connect an existing domain. If you want to connect your existing domain, simply paste the domain you want to connect.
2. Update the DNS records
The next step involves updating your DNS records. To do this:
- Go to your domain registrar.
- Remove the @ or main A record and replace it with 23.227.38.32
- Go to the www CNAME section and add storename.myshopify.com (you can find this on the domains settings page)
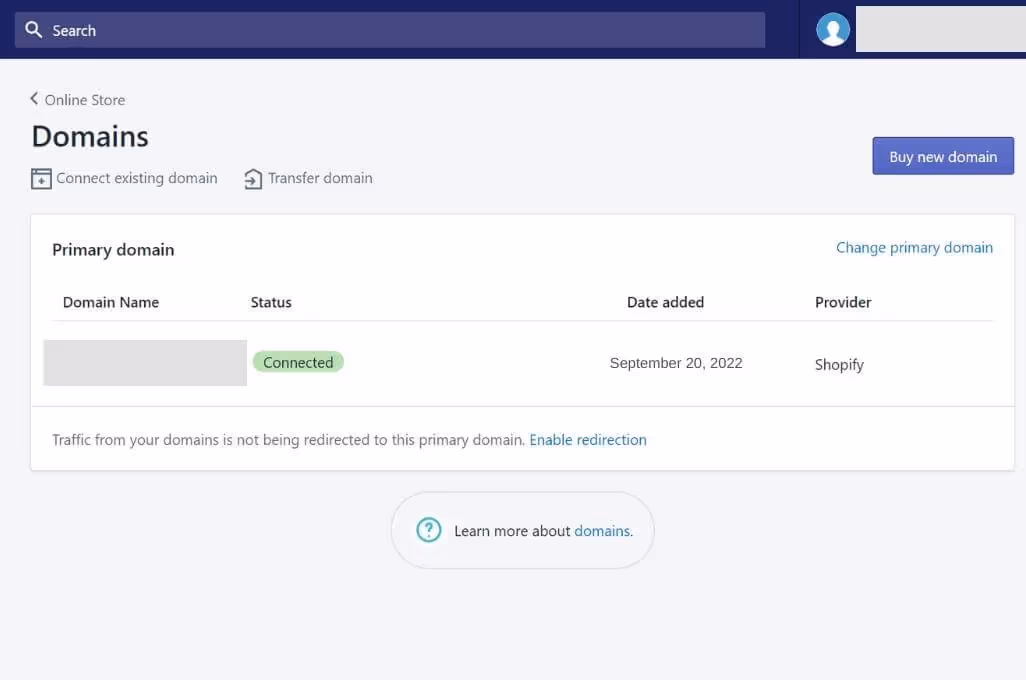
3. Set your Primary Domain
To make sure the SEO score of your domain is healthy, don't forget to set your primary domain. To do this,
- Go to Sales Channels > Domains and here set your primary domain.
Furthermore, remember to select Redirect all traffic to this domain. This option ensures that all traffic from the other domains goes to the primary domain.
4. Remove any Storefront Passwords
If you forget to remove the storefront password, visitors won’t be able to access the store when it goes live. To do this:
- From the Shopify admin, Go to Online Store > Preferences
- Navigate the Restrict Store Access section, under Password protection uncheck/deactivate the password and then click Save.
5. Adding Other Domains
If you own more than one domain, repeat the first and second steps to add them. Note that their traffic will be redirected to the primary domain unless you change it.
Final Check Before Publishing your Shopify Store
After finishing setting up your store and properly following the aforementioned instructions, there are some crucial checks you need to do.
Title and Meta Description
This is the first thing visitors engage with when they visit your store. This is what tells customers about your products, and their first impression is built on this. Confirm that your title and description introduce your store and the products you sell in a convincing way.
Test your Shopify Website
Check for broken links, missing pages, content copy, site loading speeds, scan site, etc. Confirm that any themes or added apps are not slowing down your website. Customers easily get irritated when a site takes too long to load.
You should also test your store on mobile phones since a big chunk of the audience come from smartphones.
Sometimes, site owners see a coming soon page. Well, there can only be one reason for that. Double-check to ensure that the storefront password was removed.
Place a Test Order
You can also place a test order to see if everything is working fine. Follow this video tutorial to place a test order. A test order is a very crucial part of launching your store. This part enables you to point out any setbacks that might arise when a customer places an order.
You can place a test order and then cancel it. This also lets you know if your store’s checkout is working and whether the shipping options are accurately displayed. You can use Shipping Rates - Shipeasy to calculate the shipping rates and set rules based on which rates will be calculated.
If you can access Shopify Payments, there is a test mode available for merchants to test payments. Go to payment providers under settings and click Enable test mode.
Common Checks
- Confirm if the product data is accurate
- Confirm if the visuals (images and videos) are high quality and that there are no grammatical errors on the website
- Confirm that the store is accepting payments properly
- Check if all email notifications are properly being sent and received. Communication is a crucial part of eCommerce.
- Check if the shipping and tax rates are accurate.
- It is important to have an analytics tool to track the progress of your store. If you don’t have one from the Shopify app store.
Ensure You Have Legal Pages Set up
Every Shopify store must have the following legal pages:
- Terms of Service
- Return or Refund Policy
- Privacy Policy
To manage your store’s legal pages, go to Settings and click Policies.
From here, you can create all your Store policies.
Frequently Asked Questions (FAQs)
Can I add a Shopify store to my existing website?
Shopify is more than just an eCommerce platform. The Shopify Buy Button allows you to fully integrate your existing website with Shopify’s eCommerce tools. Whether your website is built on Wix, WordPress or any other top-rated website builder isn’t an issue.
Can I delete my Shopify account after the trial period?
Even though Shopify is a successful eCommerce platform with several integrated services, it takes a lot of dedication and marketing to hit massive figures. Before you make any decisions you can utilize Shopify’s 14-day free trial.
If you are satisfied with the experience, you can proceed to purchase a full subscription. However, if you are discontent you can also choose to delete your Shopify account. Here are the steps to follow:
- Go to Settings on the Shopify admin menu and select Plan
- Locate the Plan Details section and click Deactivate Store. You’ll be required to enter your password to complete the process.
Wrapping Up
Shopify’s integrated services are the biggest advantage that any online store owner can dream of. The eCommerce platform accommodates all types of users hence making it a popular and revered platform.
Though the Shopify e-commerce platform may enable you to perform specific tasks yourself, a freelance Shopify developer can also ensure the optimum solution for your business and workflows
This guide will answer your query on how you can make your Shopify store live. Things which you should before publishing your store.
Hope you got all your answers. Consider subscribing to our newsletter to receive more helpful Shopify guides.
Happy growing!
People also read:

%20(1)%20(1).avif)
%20(2).avif)

.svg)
.svg)
.svg)


.svg)