.svg)
How to Display an Estimated Delivery Date and Time on Shopify? [2026]
Last updated on
May 15, 2026
![How to Display an Estimated Delivery Date and Time on Shopify? [2025]](https://cdn.prod.website-files.com/611167e7889c927aebfd8ee2/69e09405cc35771f1c42b949_How%20to%20display%20estimated%20delivery%20date%20and%20time%20on%20Shopify.webp)
Why showing estimated delivery date increases Shopify Conversions
Before jumping into the how, it’s worth understanding why this single piece of information has such a measurable impact on sales.
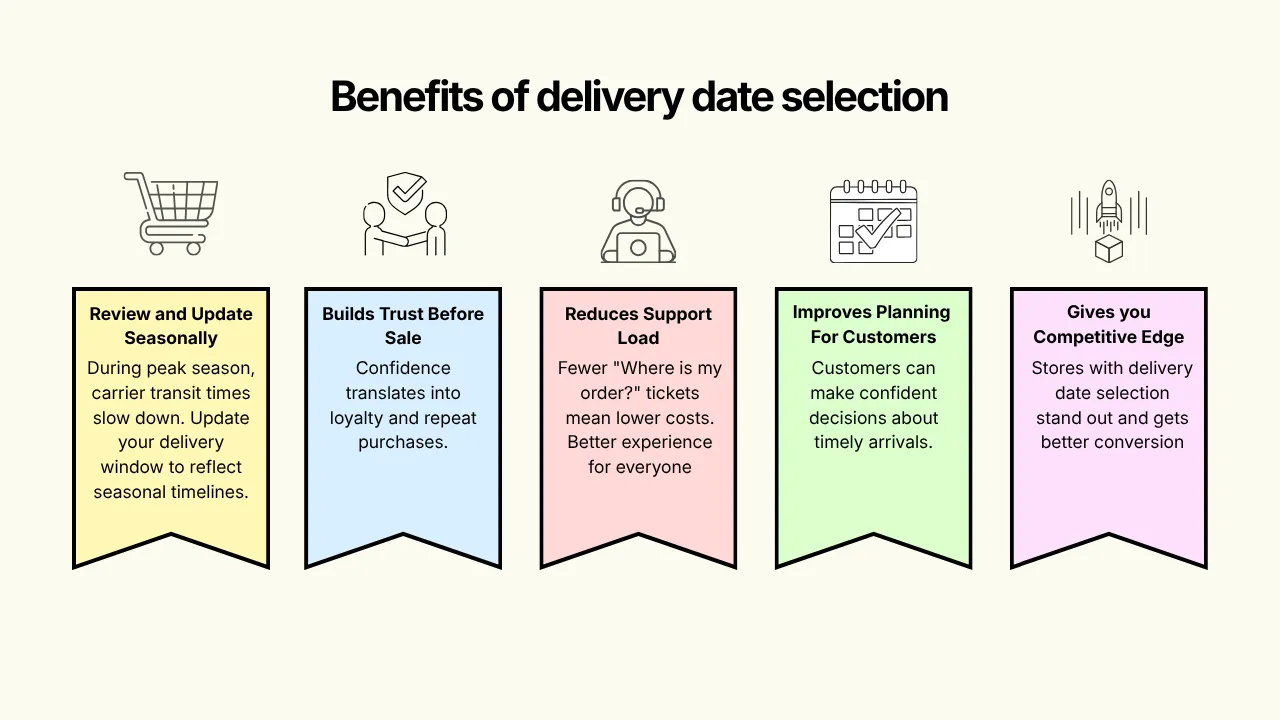
Reduces cart abandonment
When shoppers can see or choose a preferred delivery date, they’re less likely to abandon their cart out of uncertainty. Delivery clarity is one of the most effective ways to close that final gap between browsing and buying.
Builds trust before the sale
A store that shows the delivery date or lets customers pick their preferred delivery date builds confidence with customers. That confidence translates directly into brand loyalty and repeat purchases, especially during the holiday season when timing matters most.
Reduces customer support load
“Where is my order?” is one of the most common support tickets in ecommerce. When customers select their preferred delivery date, those tickets drop. That means lower support costs and a better experience for everyone.
Improves planning for your customers
Someone ordering a birthday gift, a holiday decoration, or a perishable product needs to know if it will arrive in time. Giving them the option to select when the products will be delivered can be huge plus for customers to make confident decisions.
Gives you a competitive edge
Most Shopify stores still don’t show estimated delivery dates or let customers choose their preferred delivery date. Stores that do stand out and that flexibility of choosing preferred delivery dates directly impacts conversion rates.
3 ways to show estimated delivery date on Shopify
Here’s a quick comparison before we dive into each method:
Method 1: Using a Shopify App (Recommended for Most Stores)
If you want to display estimated delivery dates without writing any code or if you want customers to actually choose their preferred delivery date and time, a dedicated Shopify app is the fastest and most flexible solution.
Pickeasy is built specifically for this.
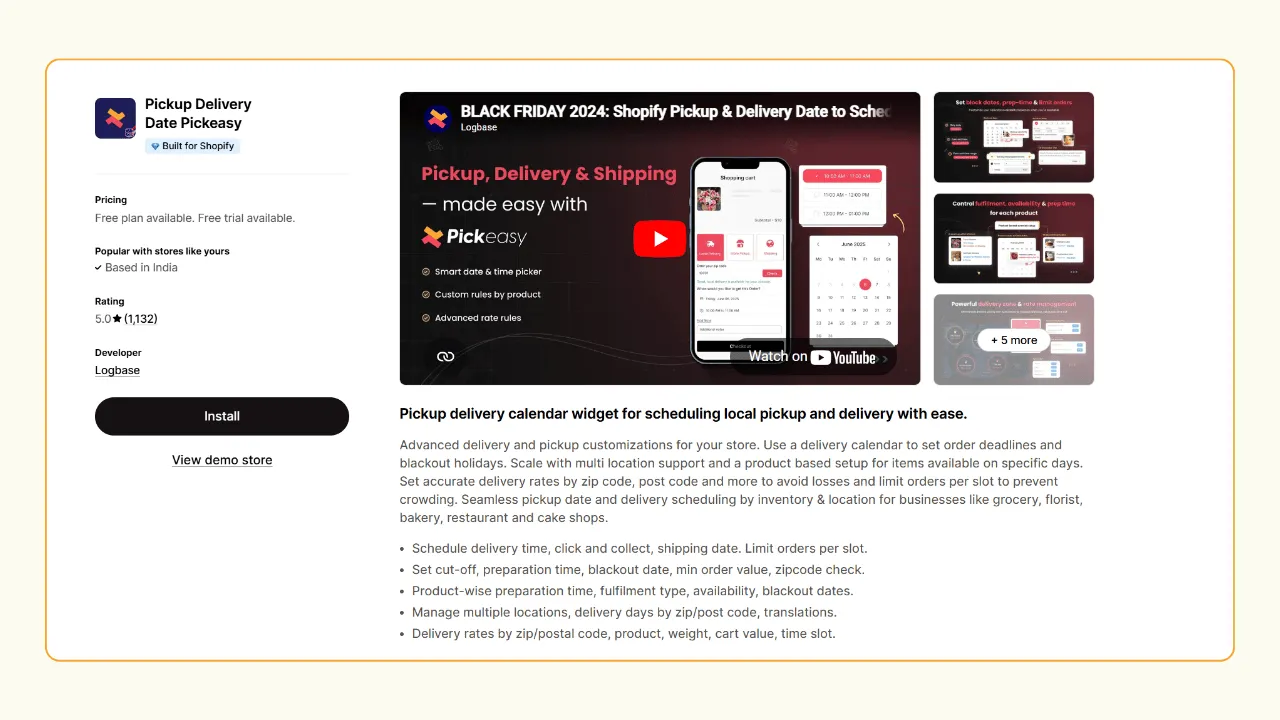
What Pickeasy lets you do:
- Show estimated delivery dates and time slots directly on the cart page
- Let customers pick their preferred delivery date from the calendar
- Set cut-off times (e.g., orders placed after 2 PM ship next day)
- Block out holidays, store closures, and custom blackout dates
- Set per-product preparation times (e.g., custom cakes need 2 days)
- Show different delivery windows by zip code or postal code
- Limit the number of delivery per time slot to avoid overload
- Supports multi-location stores and Shopify POS
Step-by-step: Installing Pickeasy and enabling delivery dates
1. Go to the Shopify App Store and install Pickeasy.
2. Enable the Pickeasy app on your store theme editor.
3. Go to the Locations page in Pickeasy app and add your store location(s).
4. Select Local Delivery as your fulfillment type.
Note: You can set up both in-store pickup and local delivery in your store as well.
5. Set the minimum order value for local delivery.
6. Configure how you want to validate local delivery eligibility, you can either use zip codes or distance.
7. Set the time slots, order limits, blockout dates, and per-product preparation times.
8. Click Save and the estimated delivery date picker will appear on your store’s cart page.
App rating: ★ 5.0 rating (1100+ reviews)
Plans & Pricing:
- Free plan
- Starter: $9.99/month
- Smart: $16.99/month
- Premium: $24.99/month
- 14-day free trial on all paid plans
Method 2: Adding estimated delivery date in Shopify themes (Custom liquid code)
If you’re on a Shopify 2.0 theme (like Dawn, Sense, Craft, or any theme built after 2021) and just want to display a simple estimated delivery date range on your product page, you can do it with a custom liquid block.
What you’ll get: A line like “Get it by Friday, May 23 - Thursday, May 29” on your product page, automatically calculated from today’s date.

Step-by-step instructions:
1. In your Shopify admin, go to Online Store → Themes.
2. Click Edit theme on your active theme.
3. From the top dropdown in theme editor, go to Products → Default product (or your custom product template).
4. In the left sidebar, click Product information, click Add block and select Custom Liquid.
5. Drag the block to the position on the page where you want the delivery date to appear (typically below the price or the Add to Cart button).
6. Copy-paste the following code in the Custom Liquid field:
<p style="margin: 8px 0; font-size: 12px; display: flex; align-items: center; gap: 8px">
    <img src="https://cdn-icons-png.flaticon.com/512/1670/1670915.png" style="height: 20px" alt="delivery icon" />  Get it by <strong><span id="edd-from"></span> – <span id="edd-to"></span></strong>
</p>
{{ '//cdnjs.cloudflare.com/ajax/libs/datejs/1.0/date.min.js' | script_tag }}
<script>
  var minDays = 5;
  var maxDays = 10;
  var fromDate = Date.today().addDays(minDays);
  if (fromDate.is().saturday() || fromDate.is().sunday()) {
    fromDate = fromDate.next().monday();
  }
  var toDate = Date.today().addDays(maxDays);
  if (toDate.is().saturday() || toDate.is().sunday()) {
    toDate = toDate.next().monday();
  }
  document.getElementById('edd-from').innerHTML = fromDate.toString('dddd, MMMM dS');
  document.getElementById('edd-to').innerHTML = toDate.toString('dddd, MMMM dS');
</script>
7. Click Save, then Preview your store to confirm the date appears correctly.
How to customize the delivery window
- To change the minimum delivery days, replace 5 in var minDays = 5 with your preferred number.
- To change the maximum delivery days, replace 10 in var maxDays = 10.
- The script automatically skips weekends and moves the date to the following Monday if it lands on a Saturday or Sunday.
Important limitations of this method
- The date range is the same for every product. It doesn’t account for per-product preparation time.
- It doesn’t adjust for holidays or store closures.
- It can’t show different dates by customer location.
If you need any of those features, the next method handles all of them out of the box.
Method 3: Show estimated delivery date based on customer location (Zip code / Postcode)
This is one of the most effective and underused features available to Shopify merchants. Showing delivery dates that are specific to where your customer lives, rather than a generic range, dramatically improves trust and conversion rates.
A customer in New York should see a different delivery date than one in rural Montana. A generic date range doesn’t communicate this. Location-specific dates do.
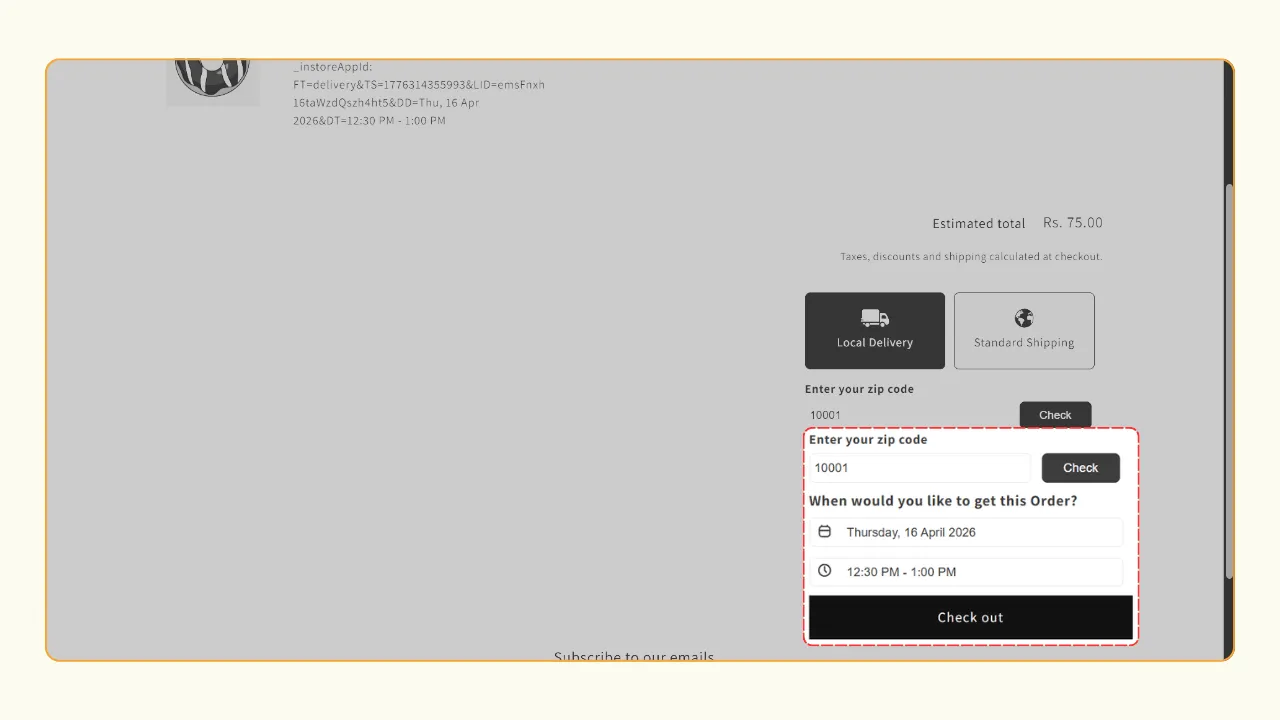
How it works with Pickeasy
Pickeasy lets you configure delivery rules based on zip code or postcode. You define different delivery windows for different locations, customers must enter their zip code or postcode to see and choose the preferred delivery date.
Setting it up:
1. Go to Locations page of Pickeasy
2. Select the location of your store and go to the Fulfillment type page.
3. Under Delivery by zip/postal code, enter the zip or postal code you deliver to.
4. You can also add zip or postal code to exclude from local delivery.
5. Click save to complete the setup.
6. Check if the zip code field appears on the cart page of your store.
7. Run a test order by entering a supported zip code and select the delivery date and time.
What customers see: Customers enter their zip code on the cart page to see estimated delivery dates and choose their preferred delivery date.
Why this matters for your store
- Customers in your local delivery area see faster dates, reinforcing the value of choosing you over a marketplace.
- Customers in remote areas get honest, realistic timelines, reducing complaints and returns.
- The zip code input on the cart page doubles as a conversion tool, customers who check their delivery date are significantly more likely to complete a purchase.
How to let customers choose their delivery date and time on Shopify
Showing an estimated delivery date is one thing. Letting customers pick the date that works for them is a more powerful conversion lever, especially for food delivery, gift stores, flower shops, furniture retailers, and any business where timing is critical.
With Pickeasy, you can replace a static estimated date with an interactive delivery date picker on your cart page.
What customers see: A calendar showing available delivery dates, with time slots if you offer them (e.g., 12:30 PM - 5 PM).

What you control:
- Which days of the week are available for delivery
- Delivery cut-off time (order placed after 3PM ships next business day)
- Minimum preparation time per product (e.g., 2 days for custom items)
- Maximum advance booking window (e.g., customers can book up to 30 days ahead)
- Blackout date for holidays, inventory restocking days, or store closures
- Maximum orders per time slot to prevent overbooking
- Same-day and next-day delivery options with configurable cut-off times
This level of control means your delivery calendar always reflects your real operational capacity, not just a generic range.
Displaying estimated delivery dates: Cart page to confirmation
Many merchants wonder whether the estimated delivery date should appear in the cart, at checkout, or the confirmation page. Here’s a practical breakdown:
In the cart page
Show an interactive calendar with available delivery dates here to let customers choose their preferred delivery date before proceeding to checkout. This placement reduces cart abandonment by giving customers control over when they receive their orders. Pickeasy displays a calendar on the cart page showing all possible delivery dates, so customers can select what works best for their schedule.
On the thank you page
Reinforce the selected delivery date on the order confirmation page to remind customers when to expect their order. This placement provides reassurance immediately after purchase and gives customers a clear reference point they can take a screenshot of or note down.
Best practice
Let customers select in the cart, then confirm on the thank you page. Display an interactive calendar in the cart where customers can choose their preferred delivery date from available options. Show their confirmed delivery date prominently on the thank you page for peace of mind. Pickeasy supports this workflow, allowing customers to choose their delivery date in the cart and see it confirmed after checkout completes.
Best Practice: Making your estimated delivery dates accurate and trustworthy
Displaying an inaccurate delivery date is worse than showing none at all. A missed promise damages trust more than not showing an estimate.
Here’s how to keep your dates reliable:
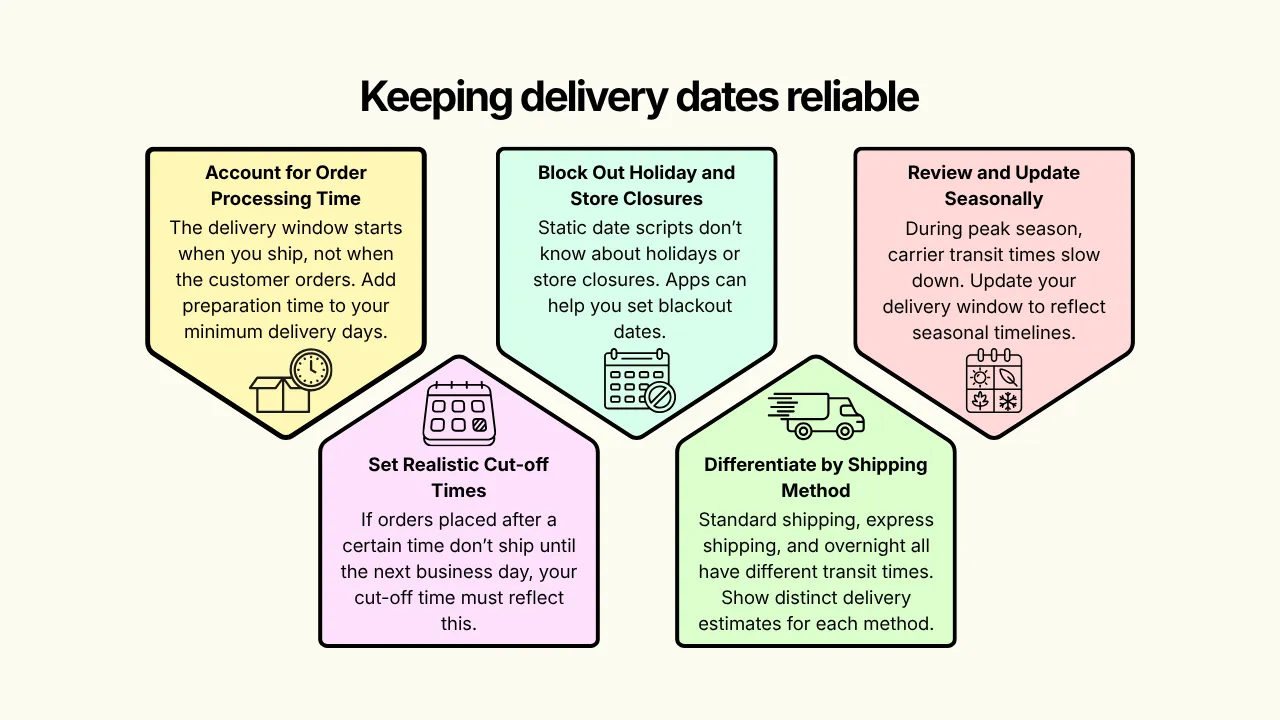
Account for order processing time
The delivery window starts when you ship, not when the customer orders. If you need 1-2 business days to pack and dispatch, add that to your minimum delivery days. Pickeasy calls this “preparation time” and you can set it per product.
Set realistic cut-off times
If orders placed after 2 PM don’t ship until the next business day, your cut-off time must reflect this. A customer who orders at 4 PM on a Friday should not see “Get it by Monday” because Monday is when you’d ship it., not when they’d receive it. The delivery date shown needs to add transit time on top of the ship date.
Block out holiday and store closures
Static date scripts don’t know about Christmas, national holidays, or your summer shutdown. Apps like Pickeasy let you set blackout dates so customers never see a delivery promise you can’t keep.
Differentiate by shipping method
Standard shipping, express shipping, and overnight all have different transit times. If you offer multiple methods, show distinct delivery estimates for each method at your store.
Review and update seasonally
During peak season (Black Friday, Christmas), carrier transit times slow down. Update your delivery window during peak season to reflect seasonal timelines and display a clear holiday order cut-off date prominently on your store.
Wrapping up
Displaying an estimated delivery date on your Shopify store is one of the highest-leverage changes you can make to improve conversion rates, build trust, and reduce support tickets. Whether you choose a Liquid code snippet for a simple date range, or a full delivery date app for complex control, the result is the same: Customers who know when their order is arriving are customers who are more confident buying from you.
Have a question about setup? Contact our team, we’re happy to help.
Frequently Asked Questions About Shopify Estimated Delivery Dates
1. How do I add an estimated delivery date to my Shopify store for free?
You can add a free estimated delivery date to Shopify themes using the custom liquid block in the theme editor. Paste a JavaScript date calculation script into the block and position it on the product page or cart page. The script calculates a delivery range from today’s date and skips weekends automatically. For more advanced features like per-product dates, time slots, or location-based slots, install the Pickeasy app and use the free plan.
2. Can I show different dates based on the customer’s location or zip code?
Yes. Pickeasy supports location-based delivery date rules, where you configure different delivery windows for different zip codes, postcodes, or regions. Customers can enter their postcode on the cart page to see and choose their delivery date before proceeding to checkout. This is especially useful for stores with local delivery zones or regional carrier partnerships with different transit times.
3. How accurate are Shopify estimated delivery dates?
Accuracy depends entirely on how you configure them. Static scripts that add a fixed number of days are inaccurate if they don’t account for cut-off times, weekends, holidays, or order processing time. Apps like Pickeasy calculate dates dynamically based on the current time, your cut-off schedule, preparation time per product, and your configured blackout dates making them significantly more accurate and reliable.
4. What is the best Shopify app for showing estimated delivery dates?
Pickeasy is one of the highest-rated Shopify apps for estimated delivery dates with a 5/5 rating and 1,100+ reviews. It supports cart-page delivery date selection for customers, time slot picking, zip code-based delivery windows, cut-off time rules, blackout dates, and multi-location stores.
5. How do I show estimated delivery time on Shopify without coding?
Install a Shopify delivery date picker app like Pickeasy. Once installed, set up your location and configure local delivery slots, cut-off times, and blackout dates. Once configured, customers can choose their ideal delivery time on your store’s cart page.
6. Can customers choose their own delivery date in Shopify?
Yes. With a delivery date picker app like Pickeasy, you can add an interactive calendar to your cart page where customers can select their preferred delivery date and time slot from your configured availability. You can control which days are open for delivery, what time slots are offered, and how many orders are accepted per slot.
7. Does Shopify display delivery estimates by default?
No. Shopify does not show estimated delivery dates on product pages by default. Shopify provides shipping rates and basic order confirmation emails, but displaying a specific estimated delivery date on the product page requires either a custom liquid script or a third-party date app.

.webp)
%20(3).webp)
![11 Best Delivery Date Apps For Shopify to Drive Sales [2025]](https://cdn.prod.website-files.com/611167e7889c927aebfd8ee2/69f825255bcb57a0371a4cab_New%20Blog%20banner%20images%20(1)%20(2).webp)
.svg)
.svg)
.svg)


.svg)