How to Add a Preorder Button on Shopify & Fix Common Issues
Last updated on
November 13, 2026
TL;DR:
- Shopify doesn't have a built-in preorder button. You can add one using a preorder app or by editing your theme code.
- Choose button text that matches the product and payment option, such as "Preorder Now," "Backorder Now," or "Reserve with Deposit."
- Display the preorder button on product pages, collection pages, search results, and your home page so customers can easily find it.
- Common issues include missing preorder buttons, incorrect inventory settings, and deposit payments not working as expected.
- Test your preorder setup on desktop and mobile, including quick-add and express checkout options, before making it available to customers.
A product is out of stock, but customers are still interested in buying it. Or you're preparing to launch a new product and want to start accepting orders before it's available.
Instead of showing a "Sold Out" message, you can let customers place orders in advance using a preorder button.
But adding the button is only the first step. You also need to make sure customers can find it, understand when their orders will ship, and know how much they'll be charged.
In this guide, we'll walk you through how to add a preorder button to Shopify, customize its text, choose where it appears, and fix common issues that can affect your preorder setup.
What Is a Preorder Button on Shopify?
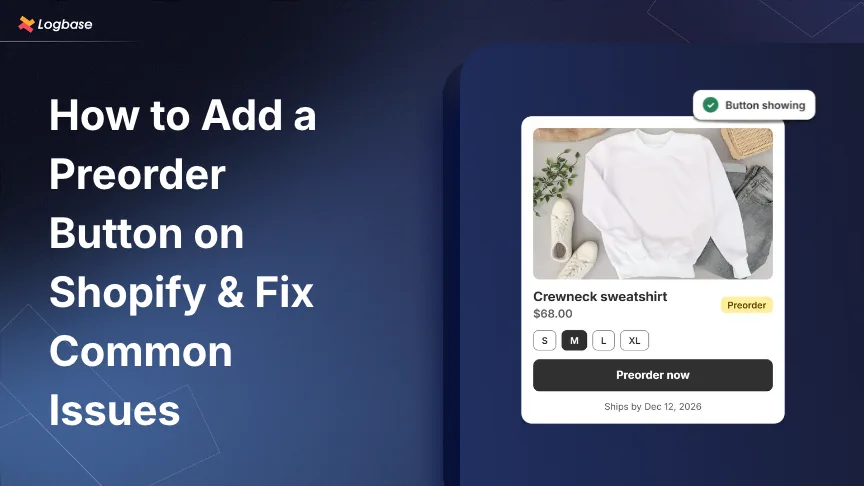
A preorder button lets customers order products before they're available for immediate shipping. Instead of showing "Add to Cart" or "Sold Out," your store displays a button such as "Preorder Now."
For example, if a product is expected to arrive next month, customers can place their orders in advance rather than leaving your store to look elsewhere.
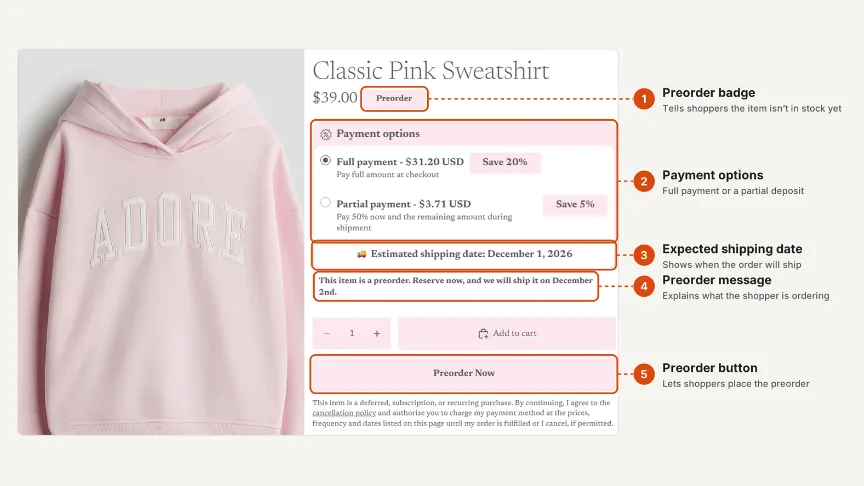
A preorder button usually appears alongside a few important details:
- Preorder badge: Shows that the product is available for preorder.
- Expected shipping date: Tells customers when they can expect their order.
- Payment details: Clarifies whether customers pay the full amount or a deposit.
- Preorder message: Explains any important details about the preorder.
These details help customers understand the terms before placing an order.
How to add a preorder Button to Shopify
There are two ways to add a preorder button to your Shopify store: use a preorder app or edit your theme code.
Method 1: Add a Preorder Button Without an App
You can add a preorder button without installing an app by using a product tag and making a small change to your Shopify theme code.
This method allows customers to place regular orders for selected products. It doesn't support partial payments or automatic preorder payment management.
Step 1: Duplicate your theme
Go to Online Store → Themes, click the three-dot menu beside your current theme, and select Duplicate. Make changes to the copy so your live store remains unaffected while testing.
Step 2: Tag preorder products
Go to Products, open the product you want to offer for preorder, and find Product organization → Tags. Add the tag preorder and save.
Repeat this for all products you want to offer for preorder.
Step 3: Allow purchases when stock reaches zero
If you want customers to purchase products after their inventory reaches zero, enable Continue selling when out of stock under the relevant product or variant's Inventory settings.
Step 4: Add shipping information
Mention that the product is available for preorder and include its expected shipping date in the product description. For example: "This item is available for preorder. Expected to ship December 1–10."
Step 5: Edit your theme code
Open the duplicate theme, select Edit code, and search for: products.product.add_to_cart
You may find it in snippets/buy-buttons.liquid, depending on your theme.
If you find this line:
{{ 'products.product.add_to_cart' | t }}Replace it with:
{% if product.tags contains 'preorder' %}
  Preorder now
{% else %}
  {{ 'products.product.add_to_cart' | t }}
{% endif %}| Disclaimer: This is a basic button customization, not a complete preorder setup. This code may also need additional conditions to handle sold-out and unavailable variants correctly. This may vary by theme, so check it against your theme's existing button logic and test it before publishing. |
This displays "Preorder Now" for tagged products and keeps "Add to Cart" for other products.
Step 6: Test and publish
Preview your duplicate theme. Test for tagged products, untagged products, variants, and regular sold-out products. Once you've tested everything, publish the updated theme.
When a product is ready for regular sales, remove its preorder tag and update its inventory settings.
When Should You Use a Shopify Preorder App?
Editing your Shopify theme can help you display a basic preorder button, but it doesn't provide all the features needed to manage preorders.
If you want to collect partial payments, set preorder quantity limits, manage expected shipping dates, or send automatic payment reminders, a preorder app is a better option.
Dibs lets you manage these preorder settings without manually editing your Shopify theme.
Method 2: Add a Preorder Button Using Dibs
Here's how to add a Shopify preorder button by setting up a preorder plan using Dibs:
Step 1: Install Dibs
Install Dibs from the Shopify App Store, then open it in your Shopify admin.
Step 2: Create a preorder plan
Click Add a plan, enter a plan name, and select Preorder.
Step 3: Choose products
Add the products or specific variants you want to offer for preorder. Set their availability and quantity limits.
Step 4: Configure your preorder offer
Set the expected shipping schedule and choose your payment option, such as full payment or a deposit.
Under Storefront customization, set the call-to-action label to Preorder Now and add a short message explaining the preorder. For your first plan, save and reopen it to access Storefront customization.
Step 5: Enable the Dibs app embed
Set the plan status to Active. Then, open your Shopify theme editor, enable the Dibs app embed, and save your theme.
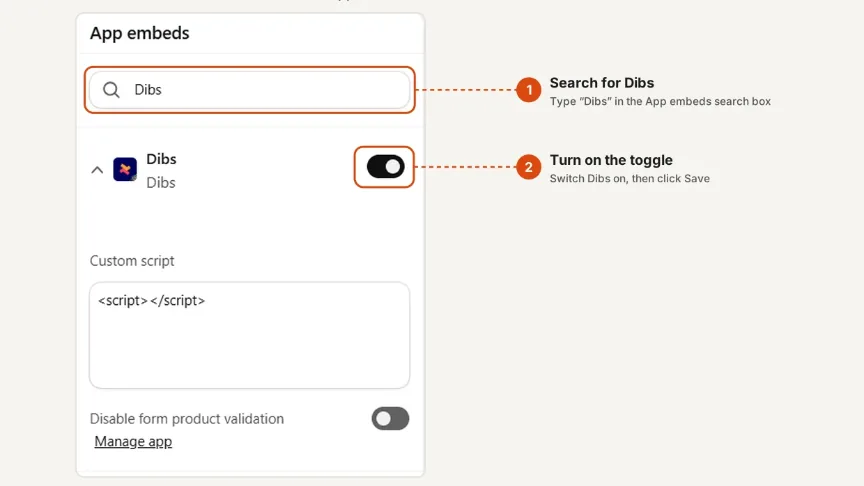
Step 6: Test your preorder button
Use Test in store in Dibs to check that the button appears correctly, variants work as expected, and customers can complete the purchase.
Once everything works, your preorder button is ready for customers. If you want a more detailed walkthrough, read our guide on how to set up preorders on Shopify.
Preorder App vs. Custom Theme Code: Which Should You Choose?
Both methods can help you add a preorder button to Shopify, but they offer different levels of functionality.
| Capability | Custom theme code | Dibs – Preorders & Backorders |
|---|---|---|
| Change button text | Manual customization | Customizable |
| Display preorder badges | Requires customization | Built-in |
| Collect deposit payments | Not supported by basic code | Available |
| Set preorder quantity limits | Requires custom development | Configurable |
| Display expected shipping dates | Manual setup | Built-in |
| Send payment reminders | Requires additional development | Automated |
| Manage backorders | Requires custom development | Supported |
What Should Your Shopify Preorder Button Say?
The words on your preorder button should tell customers exactly what they're ordering.
For example, "Preorder Now" works well for a new product launch. But if you're selling an item that's temporarily out of stock, "Backorder Now" may be more appropriate.
The goal is to make the next step clear without making customers guess.
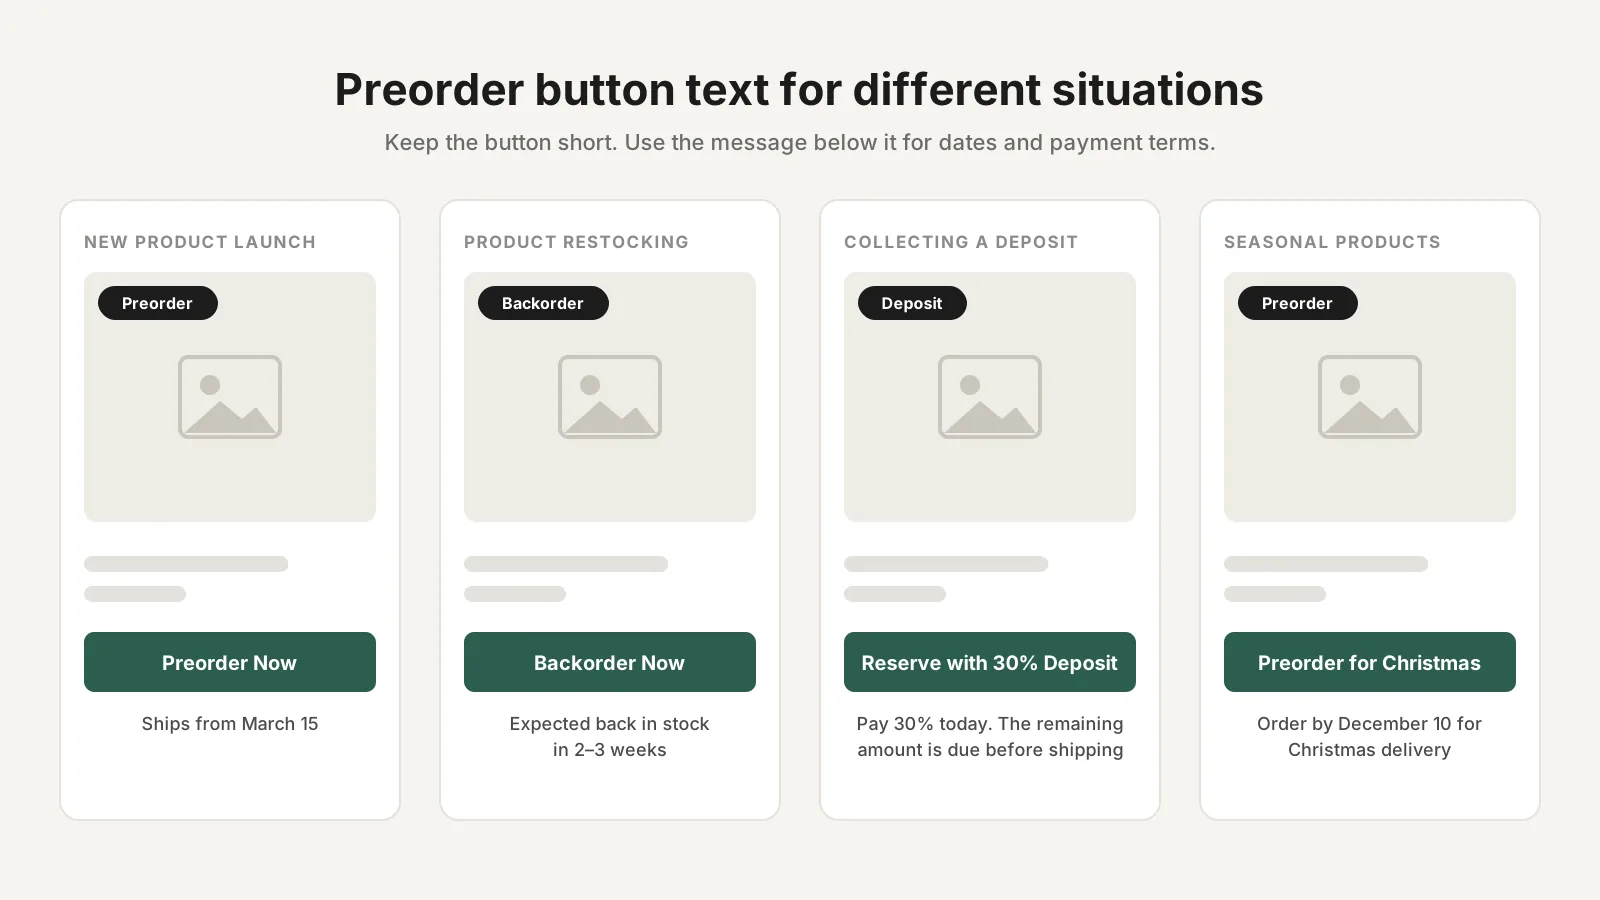
Here are some button text ideas for different situations:
| Situation | Button text | Message to display below |
|---|---|---|
| New product launch | Preorder Now | Ships from March 15 |
| Product restocking | Backorder Now | Expected back in stock in 2–3 weeks |
| Collecting a deposit | Reserve with 30% Deposit | Pay 30% today. The remaining amount is due before shipping |
| Made-to-order products | Order Now, Made for You | Made by hand. Ships in approximately 15 days |
| Seasonal products | Preorder for Christmas | Order by December 10 for Christmas delivery |
| Tours or events | Reserve Your Spot | Pay the remaining balance 30 days before your trip |
| Limited first batch | Preorder Now | Only 50 pieces available. First batch ships in April |
Where Should the Preorder Button Appear on Your Shopify Store?
Your preorder button shouldn't be limited to the product page. Customers can discover and purchase products from different parts of your store, including the home page, collection page, search page, and quick add pop-ups.
If the preorder button appears only on the product page, they might still see the regular "Add to Cart" button or a "Sold Out" label elsewhere. Ideally, your preorder option should appear in these places.
Why Does This Matter?
A customer might see the correct preorder button on the product page but a regular "Add to Cart" button in a quick-add pop-up. These small differences can confuse customers and lead to incorrect orders.
Many preorder apps offer separate settings to display preorder buttons and labels on collection pages, search results, and the home page.
In Dibs, you can easily manage these display options. You can follow our guide on how to enable preorders on collection, search, and home pages.
Why Is Your Shopify Preorder Button Not Showing?
If you've set up a preorder but the button isn't appearing, don't assume something is wrong with your entire setup. In many cases, it's a small setting that's been missed.
Here are some things to check:
| What to check | Where to look | What might be wrong |
|---|---|---|
| Preorder app is enabled | Online Store → Themes → Customize → App embeds | The app embed may be turned off |
| Product is added to a preorder plan | Your preorder app | The product may not be included in an active plan |
| Product is published | Shopify product settings | The product may still be in Draft status |
| Inventory settings are correct | Product inventory and preorder settings | The product may have stock available when the plan only allows preorders at zero stock |
| Correct theme is selected | Online Store → Themes | The app may be enabled on a theme that isn't published |
| Browser is showing the latest version | Open the store in an incognito window | Your browser may be showing an older version of the page |
| Market settings are correct | Shopify Markets and app settings | The preorder option may not work as expected in certain markets |
Check these settings one at a time. Once you've found the issue, refresh your product page and check whether the preorder button appears. If it still doesn't show, contact your preorder app's support team.
How to Test Your Shopify Preorder Button Before Launch
Before making your preorder available to customers, take a few minutes to test it. A button might look fine on your product page but behave differently when customers use quick add, express checkout, or a mobile device.
Here's a checklist you can follow:
- Open your product page in an incognito window.
- Check that the button text and preorder badge match.
- Confirm that the expected shipping date is visible.
- Visit a collection page, search results, featured products, and quick-add options and check the preorder button or badge.
- Open your store on a mobile phone and check that the button is easy to find.
- If you sell in multiple countries, check whether the preorder option works in those markets.
- Test an in-stock product to make sure it still shows "Add to Cart."
- Place a test order and confirm that the correct payment amount is collected.
- Check the order confirmation email for preorder details and the expected shipping date.
- When stock arrives, check that the button changes back to "Add to Cart," and the preorder badge disappears.
If you're collecting deposits instead of full payments, pay special attention to express checkout buttons. These buttons can take customers directly to checkout instead of the regular cart.
Depending on your preorder app and theme setup, the deposit option may not work as expected.
If you're collecting deposits, check whether your preorder app recommends hiding express checkout buttons for preorder products. Then place a test order to make sure the correct amount is collected.
Manage Shopify Preorders Without Editing Theme Code
If you want to add preorder buttons and manage preorders without manually editing your Shopify theme, Dibs – Preorders & Backorders can help.
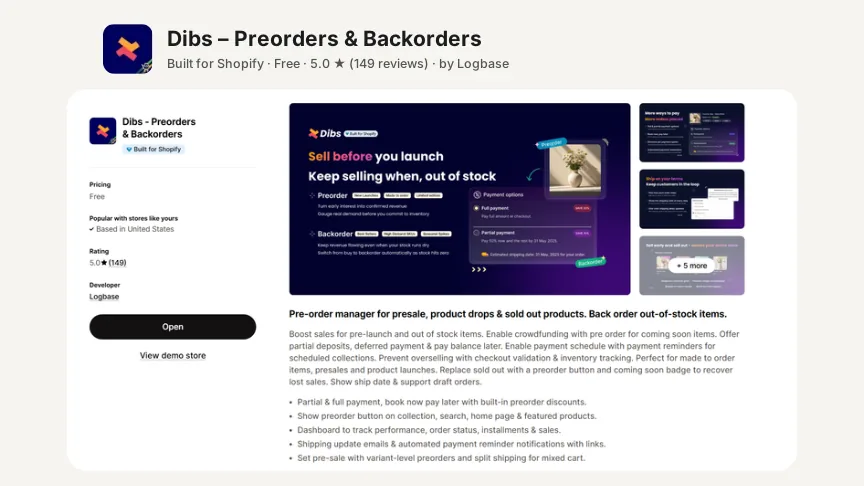
With Dibs, you can customize preorder buttons, offer full or partial payments, set quantity limits, display expected shipping dates, and manage backorders. You can also send automatic payment reminders for pending balances.
Ready to manage Shopify preorders more easily?
Frequently Asked Questions
1. Does Shopify have a built-in preorder button?
No. Shopify doesn't provide a dedicated preorder button by default. You can allow customers to purchase products when inventory reaches zero, but changing the button to "Preorder" and displaying preorder details requires an app or theme code changes.
2. How do I change "Add to Cart" or "Sold Out" to "Preorder" on Shopify?
The easiest way is to install a preorder app like Dibs, add the product to a preorder plan, and customize the button text. The app can display the preorder button based on your inventory and other settings.
You can also edit your Shopify theme code to change the button text manually, but you'll need additional changes to manage preorder payments and order limits.
3. How do I change the preorder button back to "Add to Cart" when stock arrives?
Once the product is back in stock, end its preorder plan or remove it from the active plan in Dibs. If you've enabled Continue selling when out of stock, turn it off if it's no longer needed. This ensures the preorder button and badge are removed so customers can use the regular Add to Cart button.